Repairing Nikon S2 and later rangefinder camerasRemoving the top of a Nikon S3, S4 and SP model requires almost the same steps as shown here! (whit the kind assistance of Kirk Chao)
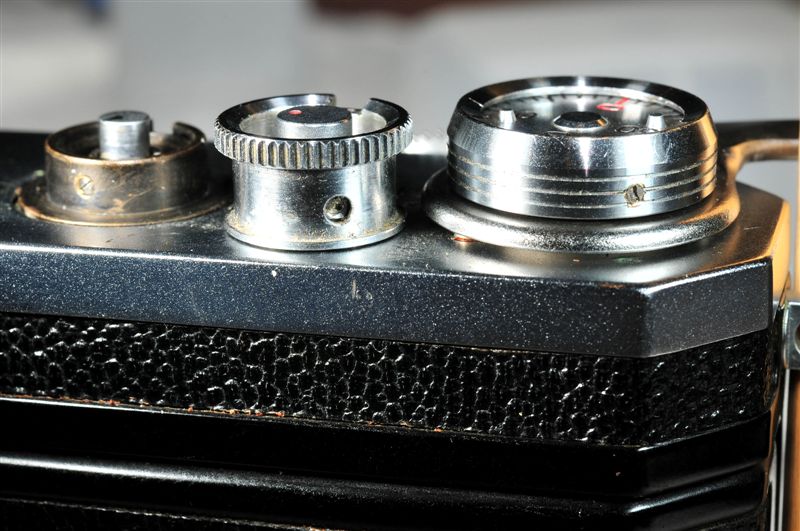
Note: although not absolutely necessary it is advisable to remove the front bezel first. The Nikon S2 shown above is a chrome dial Nikon S2; the black dial Nikon S2 is 100 % identical! (externally and internally)! To lift the top of the camera body the rewind crank, synchro selector and two screws on the left side have to be removed. On the right, the A-R ring, and shutter dials have to be removed. Details follow below.
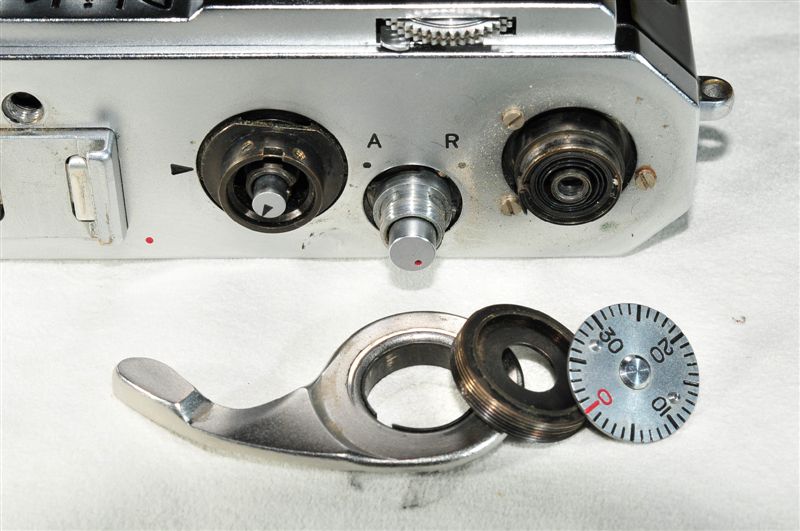
Remove the shutter dials using the steps for an S body. To remove the A-R ring, turn it so that the hole is aligned to the set screw underneath, and loosen the set screw. Then remove the retaining ring inside the A-R ring (CCW). Lift up the A-R ring. Also, remove the ring around the frame counter by loosening the set screw and turning CCW.
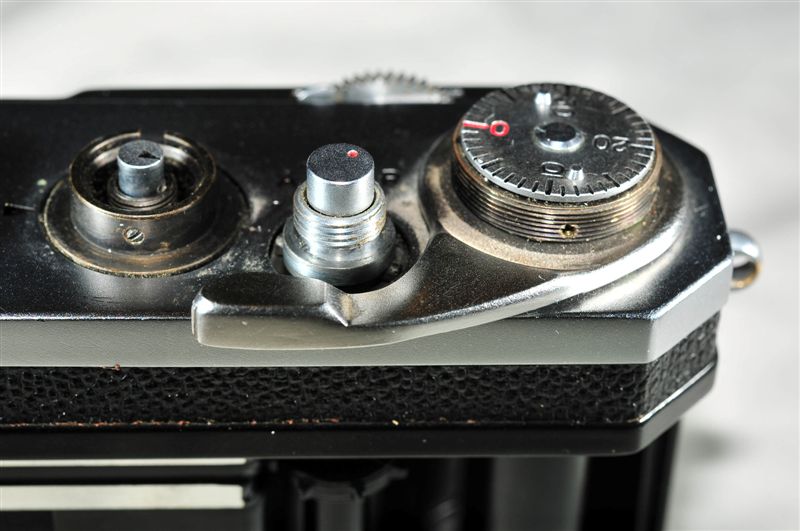
With the protective ring off, lift up the numbered dial and loosen the three set screws in the threaded ring. Carefully, lift up the threaded ring, but DO NOT dislodge the spring hiding underneath it. Lift up the advance lever without disturbing the spring.
Below you see the advance lever spring. Remove the three top plate screws. The flash gun post in front of the shoe is screwed into the body. To remove it, protect it with paper or rubber and unscrew it CCW with pliers.
All parts of the advance lever
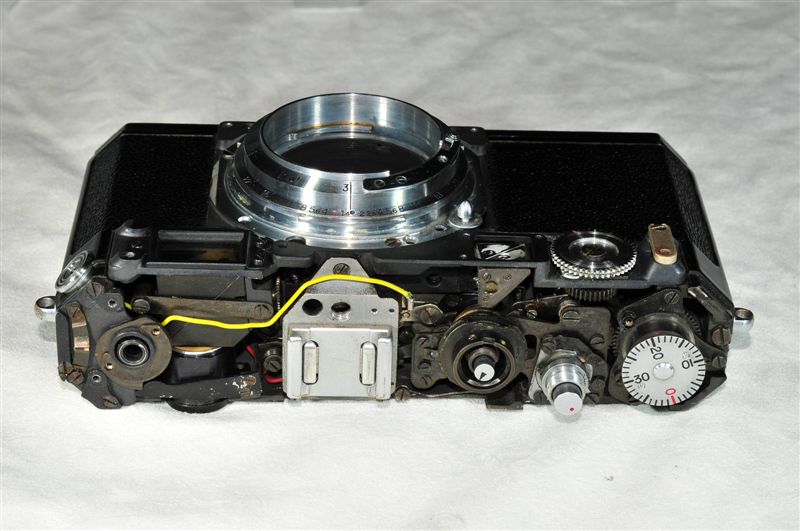
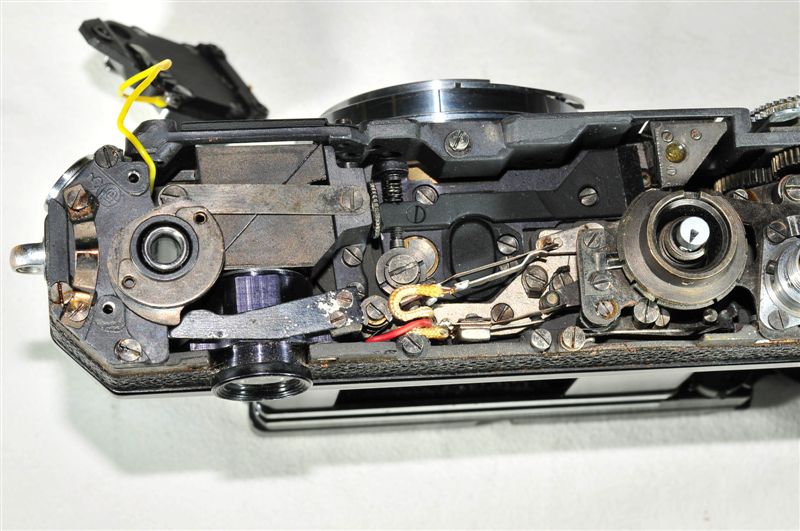
The top and front of the S2 removed. Replace the counter dial to reduce the chance of dislodging the spring. You see that the flash shoe doesn't come off with the top. It will come off after releasing three screws. By replacing it be aware of the yellow wire!
Detail of left side with flash shoe removed. Be careful - there maybe shims underneath the shoe. Put the screws and shims back so that you wouldn't lose them. Under the clamp (with a screw on both end) on the left you'll find two prisms faced together with their longest side. In between a special film is reflecting the entering light from the left front and - via a little prism - from the right front window of the rangefinder. If that film is pulverizing only the light from the right will be seen. It is very difficult to restore that film. The large black lever (in the middle) is connected to the little prism behind the right viewfinder window, and is deflected by the horizontal alignment screw that touches the eccentric rings on the left. The eccentrics are attached to the little focusing wheel underneath, inside the lens mount.
Detail of right side. Around the external focusing wheel (on the front) dirt may get sticky; so keep it clean. Next to the wheel the little mirror and window of the viewfinder can be seen. It may need a careful wash. Replace all parts and the top in reverse steps as mentioned above. When replacing the front bezel (as the last part) be careful when lifting it over the focusing wheel. Tip
from S2 Repair Manual: When removing/replacing the front bezel, set
the focus to a setting that is NOT infinity, and hold the infinity lock
tab down behind the finger wheel. No liability for failures or mistakes made by yourself!
|
 .
.